In this article, I am going to sharing ForgeRock OpenAM Custom Configuration Installation on Windows. OpenAM installation on Windows and Linux is almost similar so mentioned required changes wherever required according OS dependency, But in this article OpenAM installation showing on Windows system. Here there are two ways of OpenAM installation they are
1. OpenAM Default Configuration
2. OpenAM Custom Configuration
OpenAM Default Configuration installation already explained in the other article. In this article, I am going to sharing OpenAM Custom Configuration installation on Windows
ForgeRock OpenAM Custom Configuration Installation on Windows
Table of Contents
Before going to OpenAM installation we need to do setup prerequisites. Click here to see prerequisites instructions.
Prerequisites to be installed before going to install OpenAM Custom Configuration
- Java 1.8 to be installed
- Tomcat 8.0.36 to be installed
- OpenDJ 3.0 to be installed
- Host name to be configured (openam.example.com)
OpenAM 13.0.war Download
You can download OpenAM13.0.war file from official ForgeRock backstage site. For more details Click here.
suppose you have folder D:\forgerock\blog
Copy the downloaded war file into D:\forgerock\blog\openam13.0.war
And rename it to D:\forgerock\blog\openam.war
Tomcat webapps folder: D:\forgerock\blog\apache-tomcat-8.0.36-openam-rnd\webapps
Copy openam.war file into webapps
Tomcat folder structure as follows
Before going to start Tomcat server, we have to start OpenDJ.
OpenDJ Installation Video
How to start OpenDJ
Microsoft Windows [Version 10.0.18363.418]
(c) 2019 Microsoft Corporation. All rights reserved.

C:\Users\swamy>d:

D:\>cd forgerock

D:\forgerock>cd blog

D:\forgerock\blog>cd opendj

D:\forgerock\blog\opendj>cd bat

D:\forgerock\blog\opendj\bat>start-ds.bat
The Directory Server has started successfully.
Now open windows command or Linux terminal and then go to Tomcat bin folder and execute
How To Start Tomcat Server
Microsoft Windows [Version 10.0.18363.418]
(c) 2019 Microsoft Corporation. All rights reserved.

C:\Users\swamy>d:

D:\>cd forgerock

D:\forgerock>cd blog

D:\forgerock\blog>cd apache-tomcat-8.0.36-openam-rnd

D:\forgerock\blog\apache-tomcat-8.0.36-openam-rnd>cd bin

D:\forgerock\blog\apache-tomcat-8.0.36-openam-rnd\bin>catalina.bat run
Tomcat server has started and openam.war application deployed successfully.
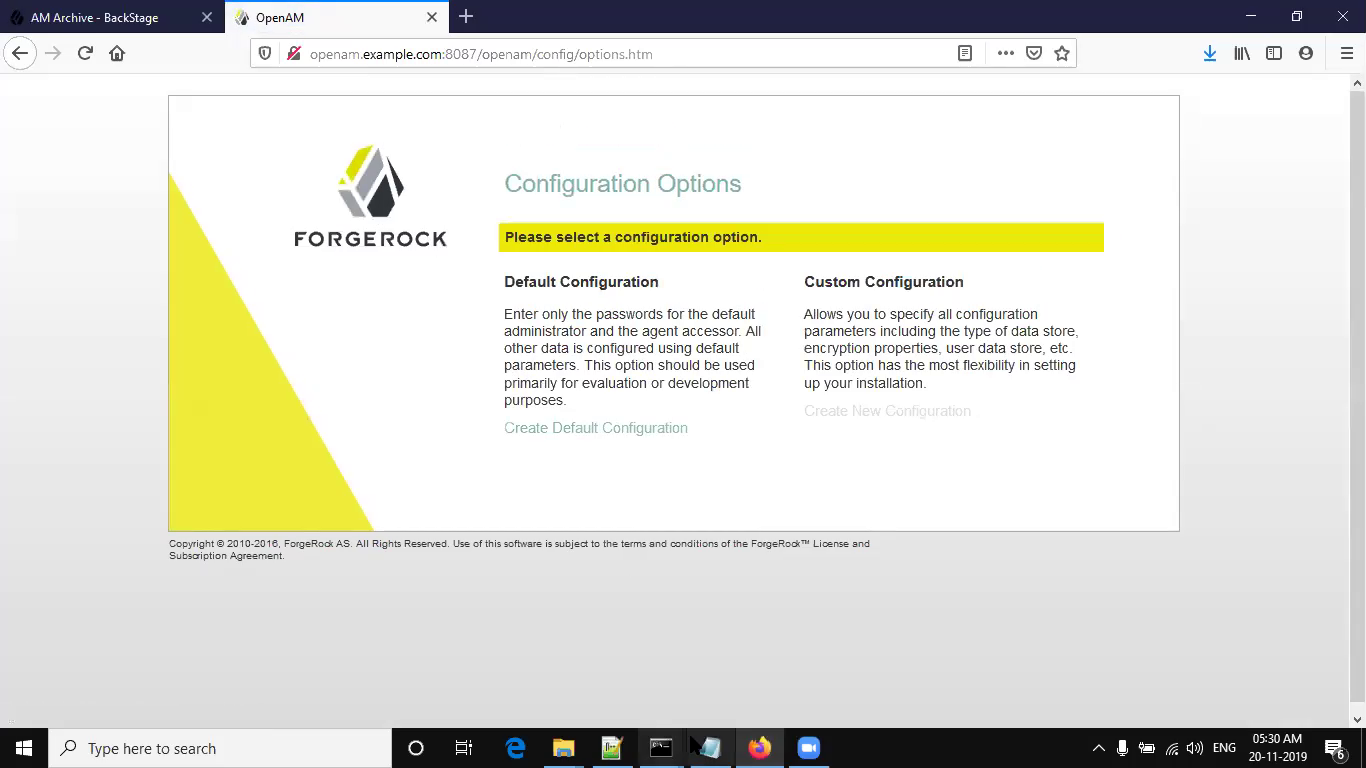
Now you can access the openam installation home page URL http://openam.example.com:8087/openam
OpenAM Installation Home
Click on Create Custom Configuration
License Agreement
Click on I accept the license agreement
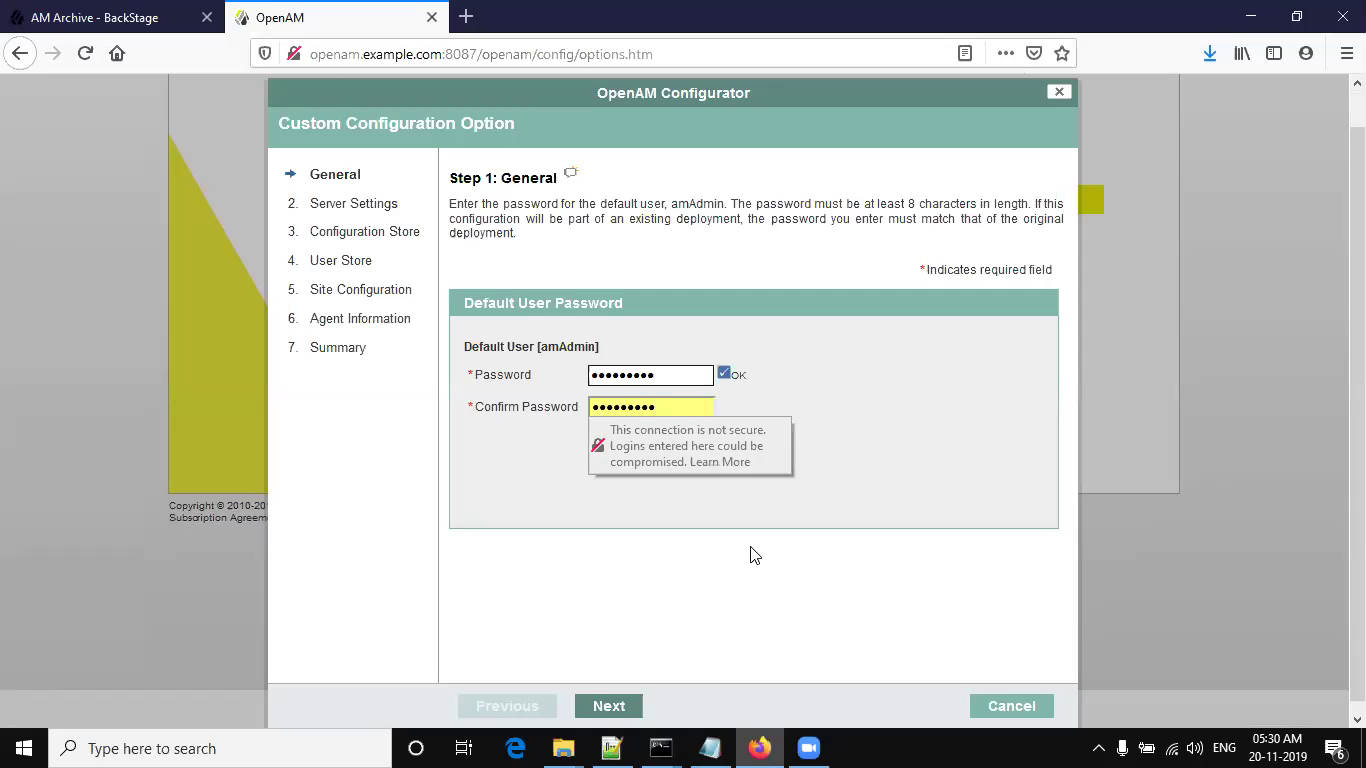
Default User Password
Here Default Username : amAdmin
Enter Default User Password: Admin1234
Click on Next
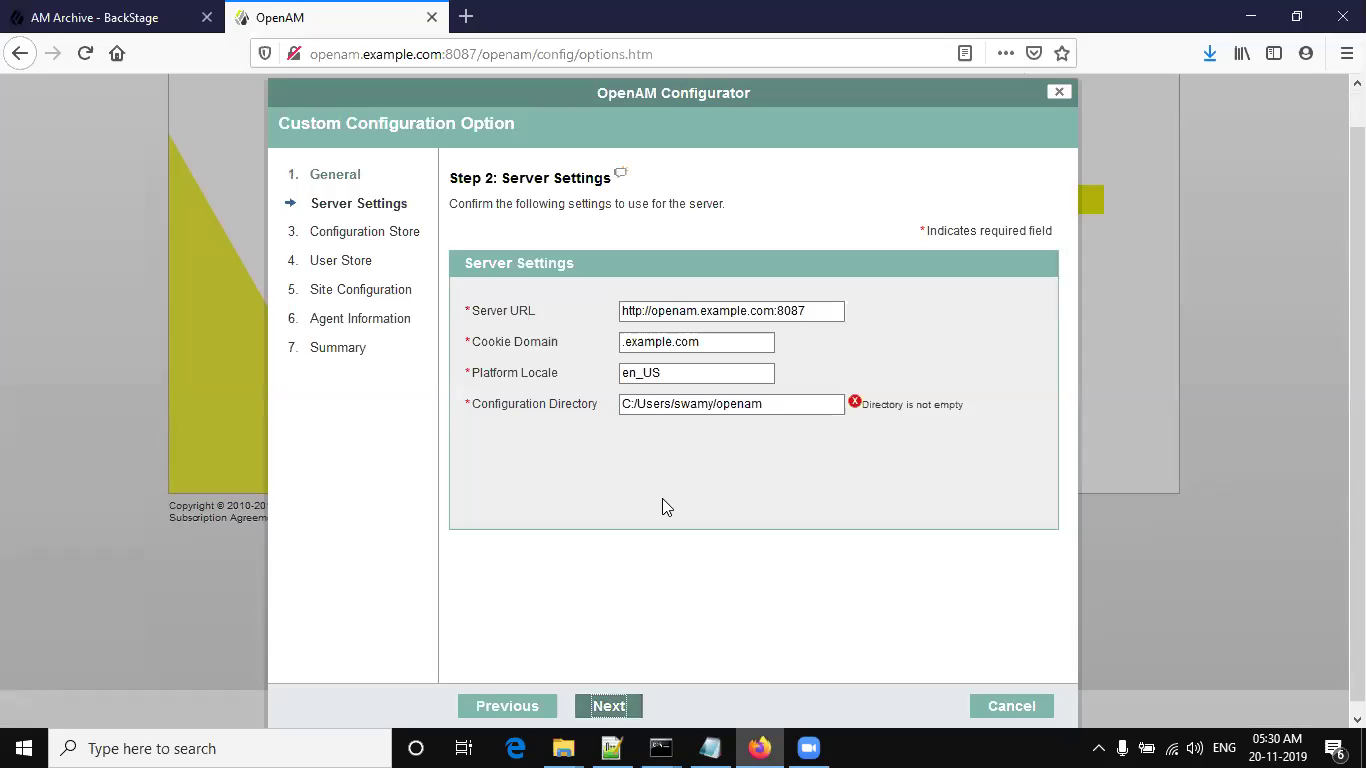
Server Settings With Default Configuration Directory
Server URL: http://openam.example.com:8087
Cookie Domain : .example.com
Default Configuration Directory: C:/Users/swamy/openam
I am going changing the default configuration directory to C:/Users/swamy/openam-blog-rnd
Server Settings With Custom Configuration Directory
Click on Next
Configuration Data Store Details
Here we are going to using Configuration Store as OpenAM. It means that it’s embedded OpenDJ using as Configuration Store.
No need to change any details, you can leave it as it is default values. If you want change, you can change.
Click on Next
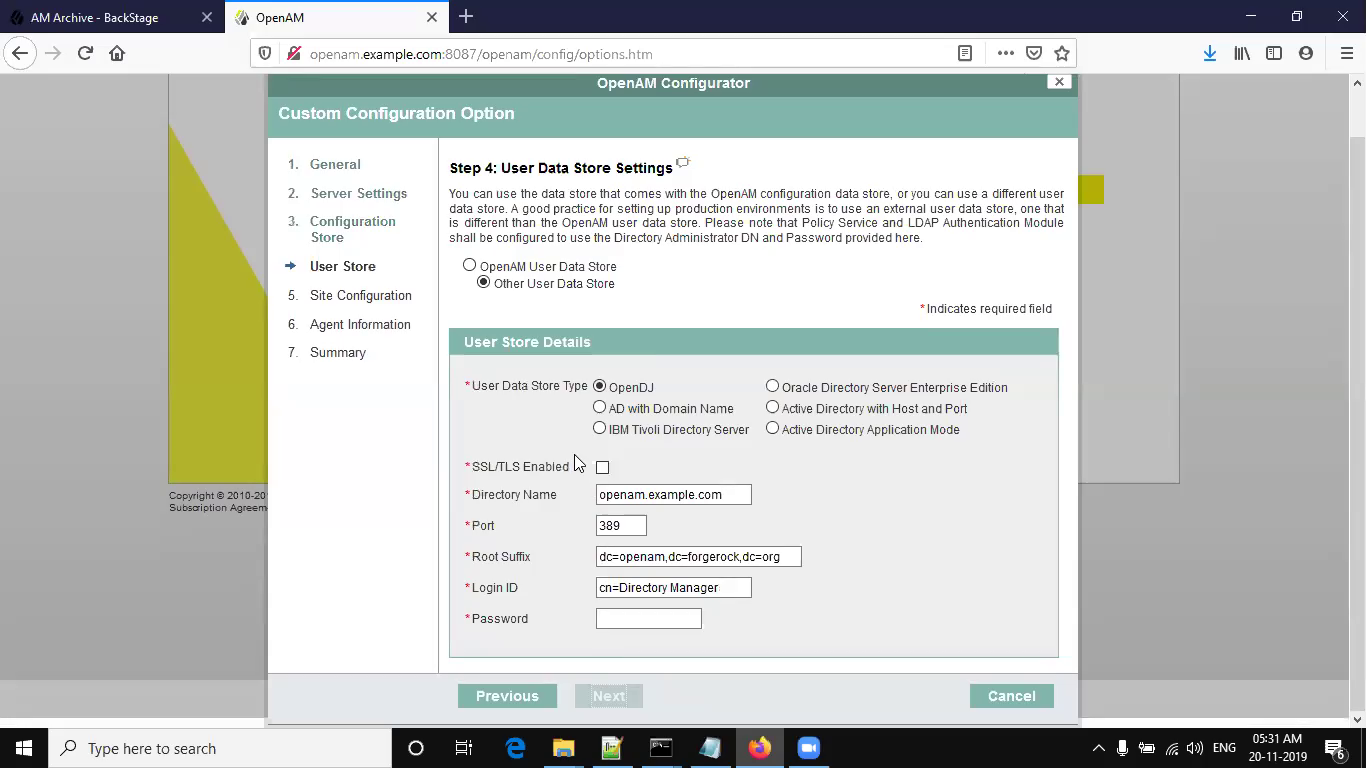
User Store Details With Default OpenDJ Details
Here I am going to using OpenDJ as User Store Details i.e. End User Details will be stored
So Enter the OpenDJ details here. Already we have installed OpenDJ.
So Default OpenDJ details needs to be updated to as follows.
User Store Details With External OpenDJ Details
Already Installed OpenDJ Details
Directory Name: opendj.example.com
Port: 389
Root Suffix: dc=example,dc=com
Login ID: cn=Directory Manager
Password: Admin1234
Site Configuration
Currently I am going to installing without load balance i.e. Single Instance, so we need to select No
Default Policy Agent User
Give password for default policy agent user, but the password should not be same as default user(amAdmin) password.
Here agent password given: Admin12345
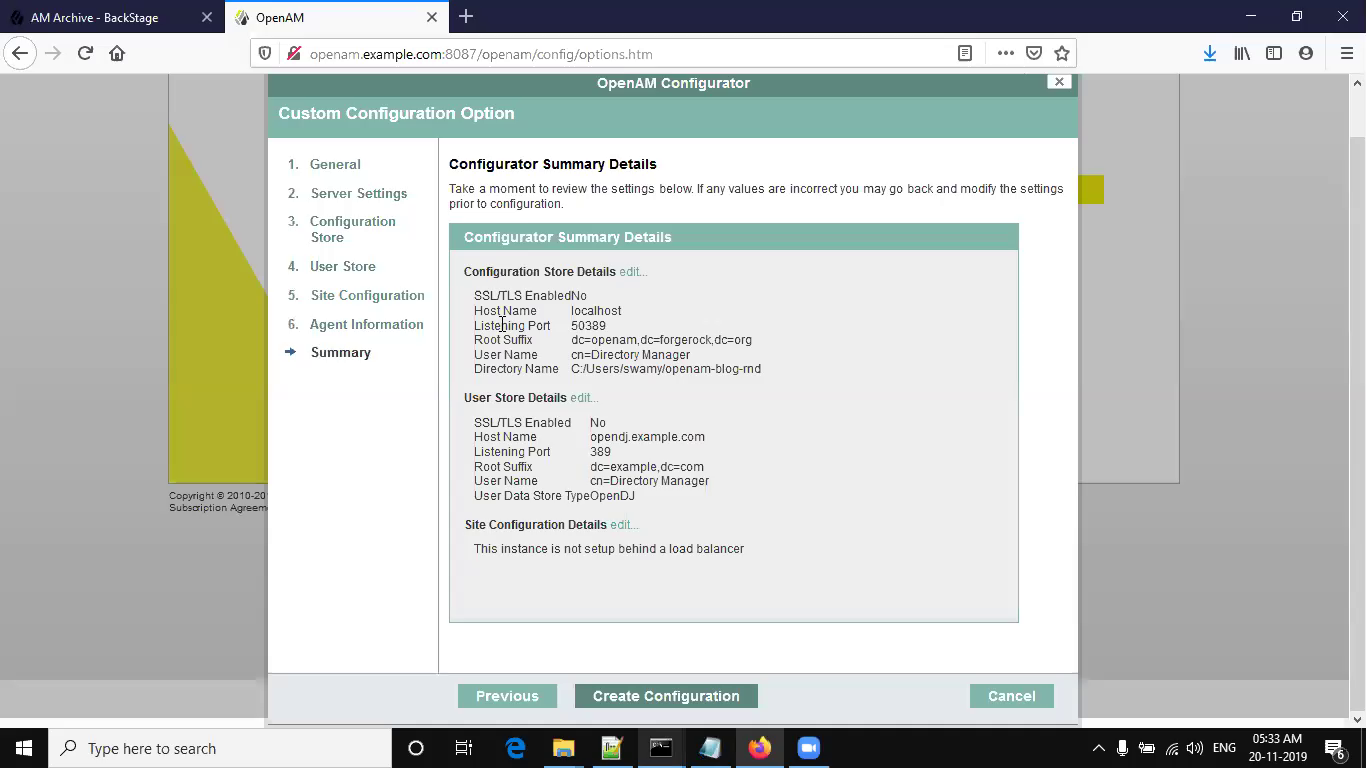
Configuration Summary Details
You can validate configuration details, if you find any incorrect configuration or want to changes details you can click on Edit on respective configuration details.
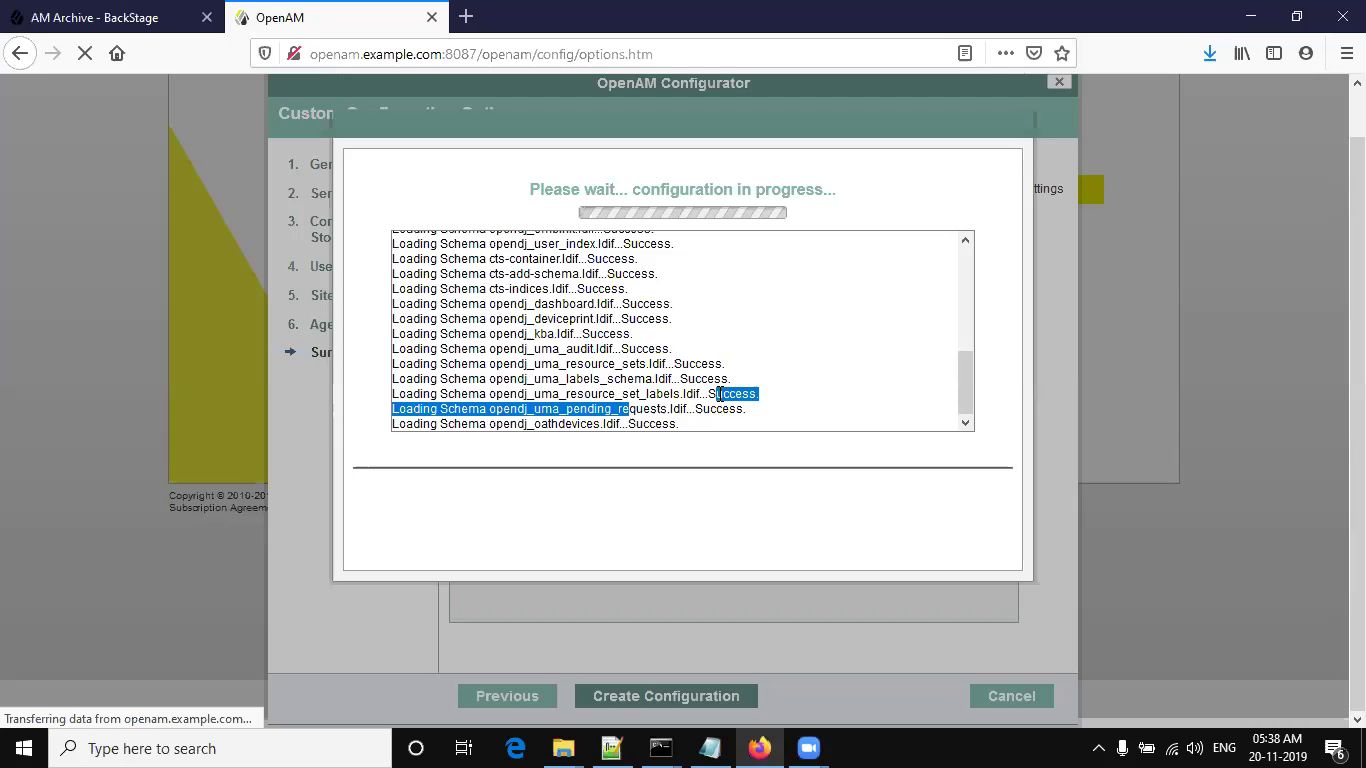
Click on Create Configuration
Installation In-Progress
Installation Completed
OpenAM Login
Click on Proceed to Login in the above step
Enter OpenAM User Credential
Username: amadmin ( Username not case sensitive here)
Password: Admin1234
OpenAM Login Successful

Hello! I am Narayanaswamy founder and admin of narayanatutorial.com. I have been working in the IT industry for more than 12 years. NarayanaTutorial is my web technologies blog. My specialties are Java / J2EE, Spring, Hibernate, Struts, Webservices, PHP, Oracle, MySQL, SQLServer, Web Hosting, Website Development, and IAM(ForgeRock) Specialist
I am a self-learner and passionate about training and writing. I am always trying my best to share my knowledge through my blog.


