Apache Cassandra Database Installation in Windows
Table of Contents
In this article, I am going to show how to install Apache Cassandra Database in Windows. Apache Cassandra is a highly scalable, high-performance distributed database designed to handle large amounts of data across many commodity servers, providing high availability with no single point of failure.
It is a type of NoSQL database.
Step 1: Pre-Requisites
- >=Java 1.8 should be installed
Step 2: Download Cassandra
Apache Cassandra software we can’t download from official Apache Cassandra website for windows system so there is a partner website i.e DataStax to download for windows system.
Download Cassandra database from DataStax to install in windows.
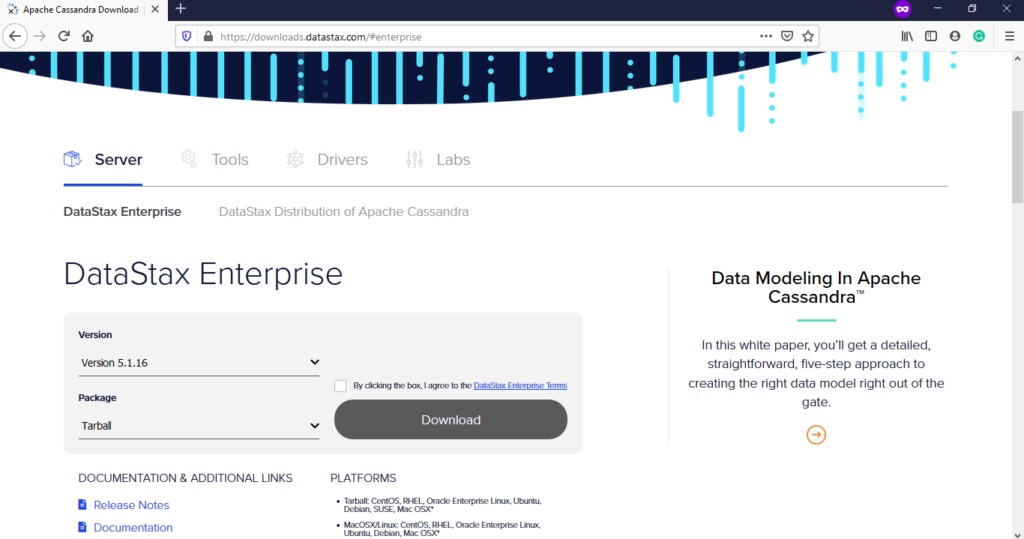
Apache Cassandra Datastax 5.1.16
Select version 6.7 and click on Download, and ddac-5.1.16.zip will be downloaded.
Step 3: Installation
Create a folder in D:\ drive as Cassandra and paste ddac-5.1.16.zip into it. Unzip it ddac-5.1.16
Step 4: Start Cassandra Database
Open windows command prompt, go to the bin folder inside ddac-5.1.16 and execute the cassandra.bat file and then Cassandra database will be started.
D:\>cd cassandra

D:\cassandra>cd ddac-5.1.16

D:\cassandra\ddac-5.1.16>cd bin

D:\cassandra\ddac-5.1.16\bin>cassandra.bat
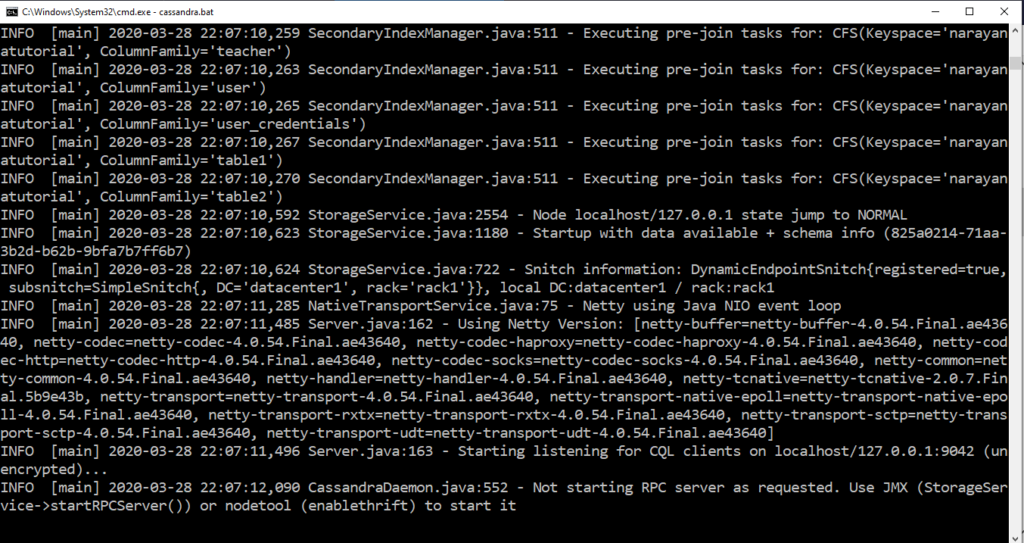
Apache Cassandra Database Started
Step 5: Access Cassandra database
There are 3 ways to access Cassandra database
- Executing cqlsh.bat which is available in the bin folder inside ddac-5.1.16
- Use DataStax DevCenter ( Which is no longer support but currently we can use it)
- Use DataStax Studio ( DevCenter replaced by Studio)
In this article, I am going to using DataStax DevCenter to access the Cassandra Database.
Step 6: DataStax DevCenter Download
There is no .exe file to installation and its packaged software so just download it is a zip file and unzip it and then start the tool.
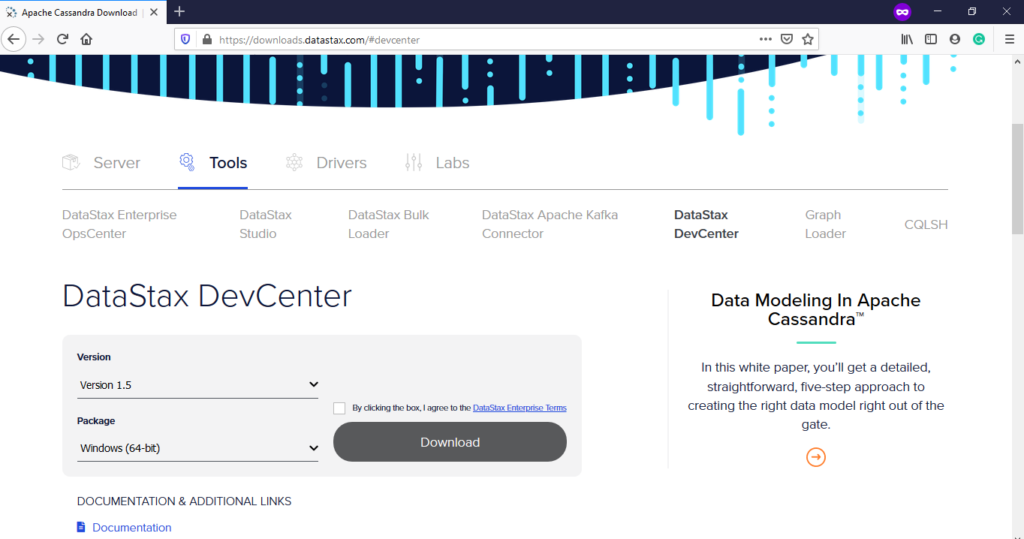
DataStax DevCenter 1.5
Go to website –> Tools –> DataStax DevCenter
Version: 1.5
Package: Windows(64-bit)
Click on Download to download the DevCenter as zip and copy into D:/cassandra and unzip it as follows
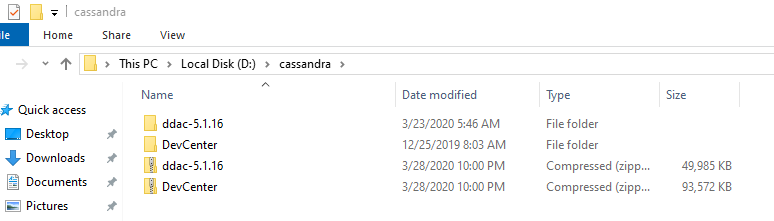
Cassandra DataStax Folder Structure
Go to D:\cassandra\DevCenter and double click on DevCenter to start the DataStax studio to access the Cassandra database.
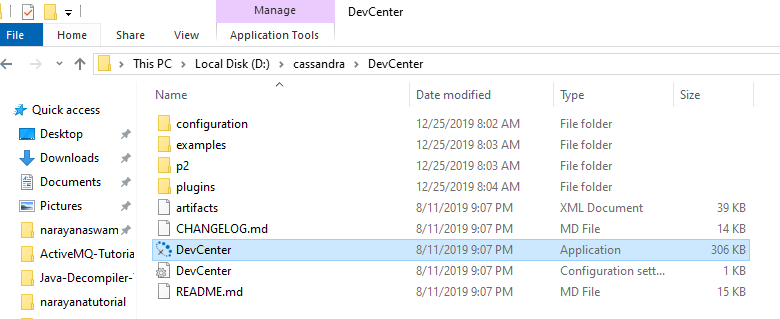
Cassandra DataStax DevCenter Start
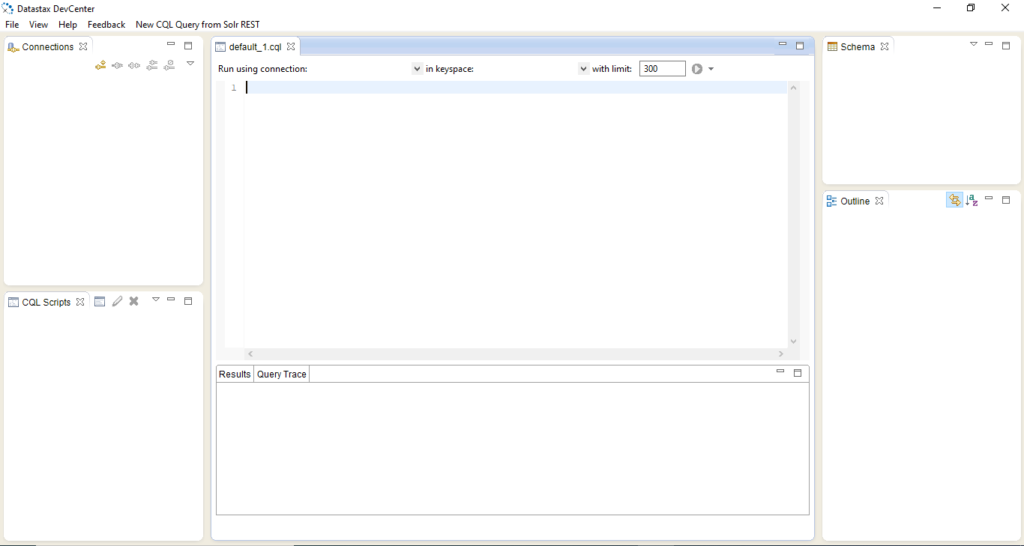
Cassandra DataStax DevCenter Home
Step 7: Configure Cassandra Database Details in DevCenter
Click on Create New Connection, and enter the details as follows.
Contact Hosts: localhost
Native Protocol Port: 9042
Click on Add to add contact hosts into active.
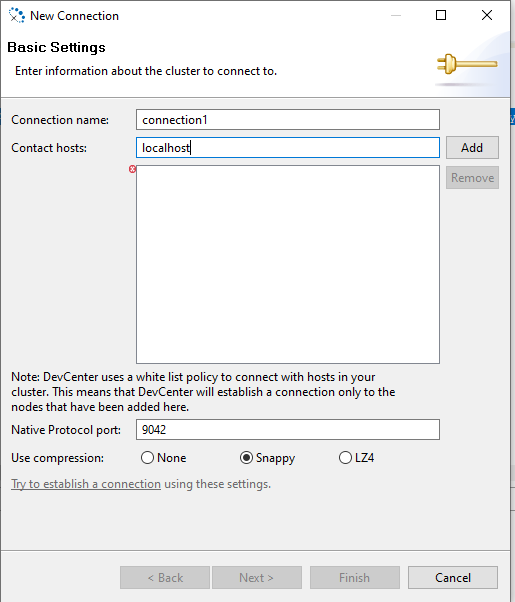
Cassandra DataStax DevCenter Connection -1
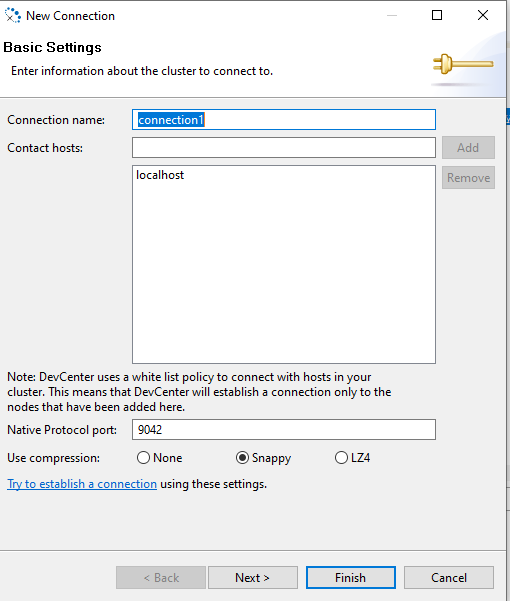
Cassandra DataStax DevCenter Connection -2
Click on Next
Cassandra DataStax DevCenter Connection -3
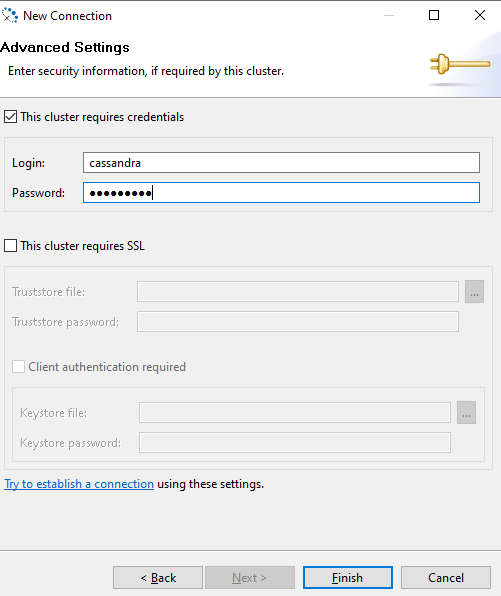
Enter the default login name: cassandra
Enter the default password: cassandra
And click on Try to establish a Connection to validate the given details
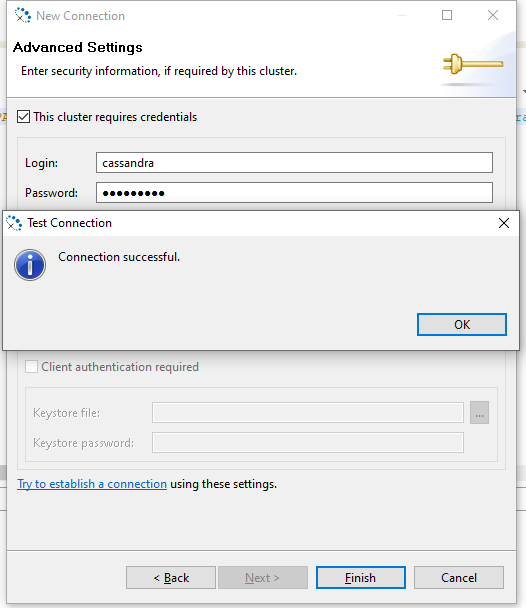
Cassandra DataStax DevCenter Connection -4
Connection successfully created and right-click on connection 1 and click on Open Connection
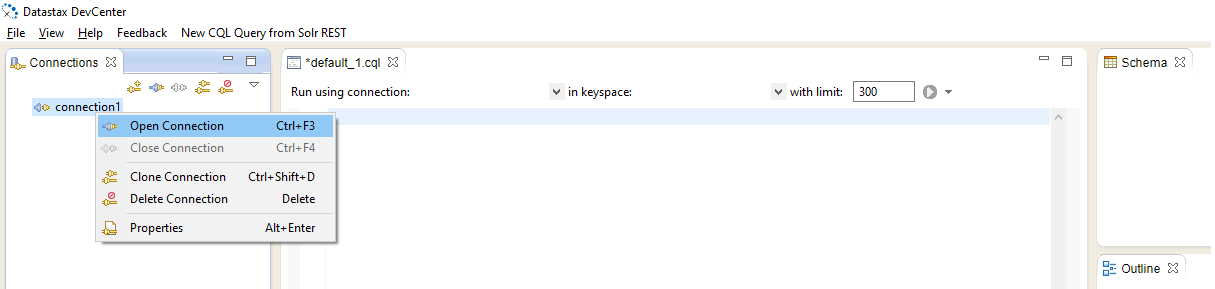
Cassandra DataStax DevCenter Connection -5
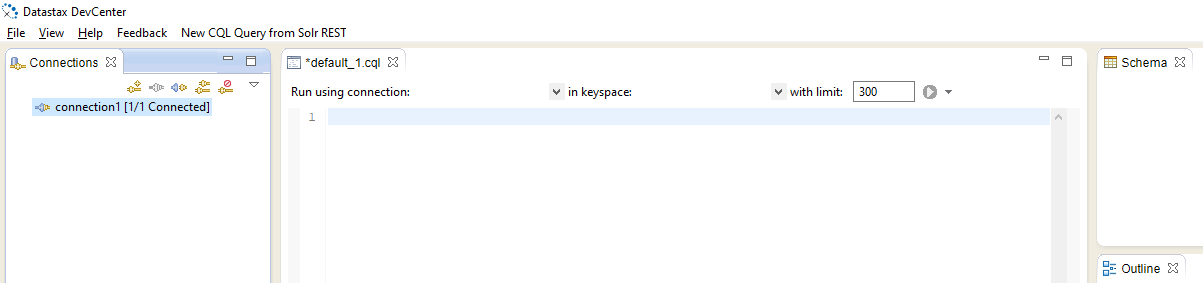
Cassandra DataStax DevCenter Connection -6
Now Cassandra database connected successfully and you can create keyspace.
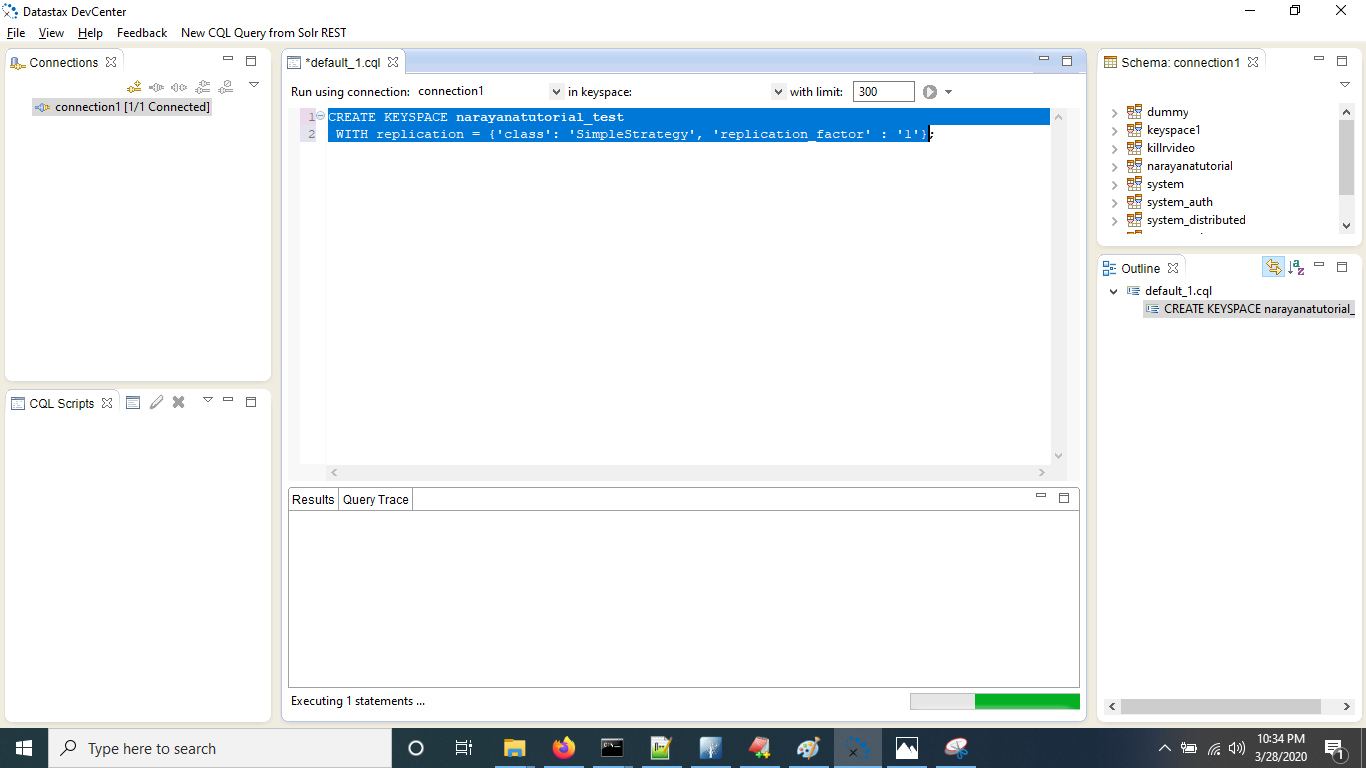
Cassandra DataStax Keyspace Created
I hope you understand “Apache Cassandra Database Installation in Windows”, Thanks for reading. Please comment.
Related Posts
 Online Videos")


Hello! I am Narayanaswamy founder and admin of narayanatutorial.com. I have been working in the IT industry for more than 12 years. NarayanaTutorial is my web technologies blog. My specialties are Java / J2EE, Spring, Hibernate, Struts, Webservices, PHP, Oracle, MySQL, SQLServer, Web Hosting, Website Development, and IAM(ForgeRock) Specialist
I am a self-learner and passionate about training and writing. I am always trying my best to share my knowledge through my blog.

