Hyper-V is a virtualization technology from Microsoft Corporation available on Windows 10 Pro, Enterprise, and Education.
Windows 10 allows you to create one or multiple virtual machines to install and run different OS on the same physical hardware.
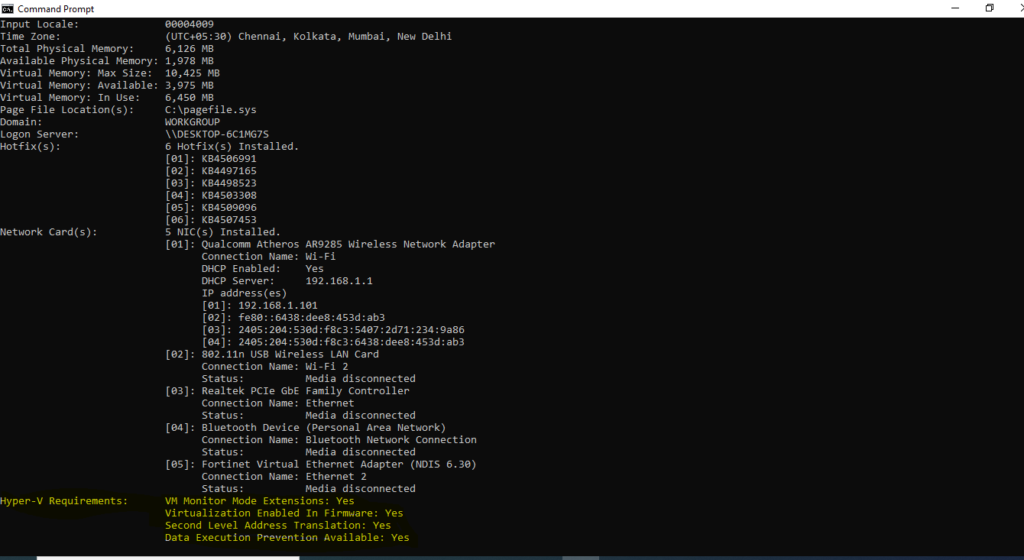
Verifying Hyper-V enabled or not through command prompt
- Open command prompt, by pressing windows+R, then enter cmd
- Enter systeminfo
- And see the following output
- Find highlighted in color in the below screen
Verifying Hyper-V enabled or not through command prompt
If the above command displays No under Hyper-V Requirements, then your hardware doesn’t support this feature, or you need to make sure to enable it manually.
How to enable Hyper-V
Hyper-V feature need to be enabled in Turn Windows features on or off
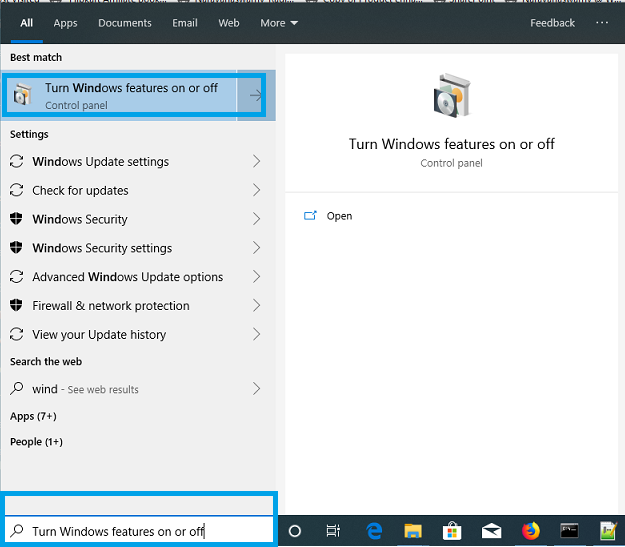
We can go to Turn Windows features on or off in two different ways
- Press windows button and then type turn windows features on or off
2. Open Control Panel, Programs –> Turn Windows features on or off
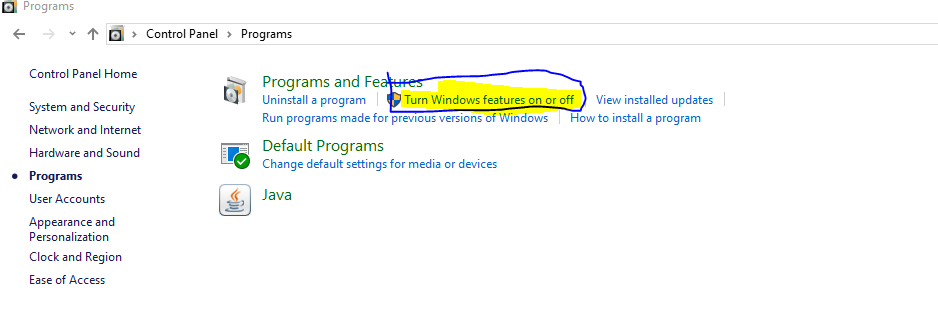
Click on Turn windows features on or off and see the Windows Features window.
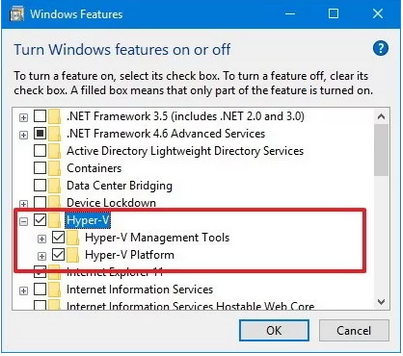
Find Hyper-V by scrolling down and then select Hyper-V Management Tools and Hyper-V Platform and Click on Ok
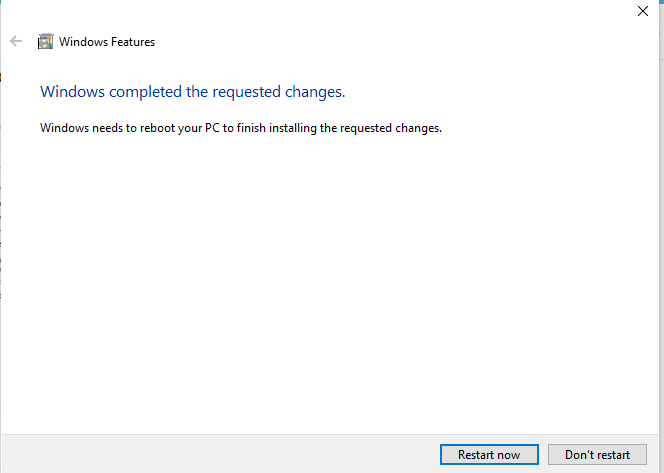
After installation complete, you need to restart the system to reflect the changes.

Hello! I am Narayanaswamy founder and admin of narayanatutorial.com. I have been working in the IT industry for more than 12 years. NarayanaTutorial is my web technologies blog. My specialties are Java / J2EE, Spring, Hibernate, Struts, Webservices, PHP, Oracle, MySQL, SQLServer, Web Hosting, Website Development, and IAM(ForgeRock) Specialist
I am a self-learner and passionate about training and writing. I am always trying my best to share my knowledge through my blog.

