OpenIDM Social Google OAuth2 Login
Table of Contents
In this article, I am going to show the OpenIDM Social Google OAuth2 Login. In the previous article explained about OpenIDM User Self Service. Here we are showing how to login into OpenIDM by using Google account. Here Google acting as an identity provider to OpenIDM. Nowadays most of the websites using social login i.e Google, Facebook, LinkedIn, WordPress, etc… Due to this one user account can be used to login to multiple websites so it’s called Single SignOn(SSO). Once account multiple websites accessing.
Before going to show OpenIDM Google OAuth2 Login, OpenIDM should be installed already in the system.
OpenIDM Installed Summary Details
Admin URL: http://openidm.narayanatutorial.com:8082/admin
Username: openidm-admin
Password: openidm-admin
User Self Service URL: http://openidm.narayanatutorial.com:8082/
Step 1: OpenIDM – Admin Home
Access Admin URL, and enter the username and password
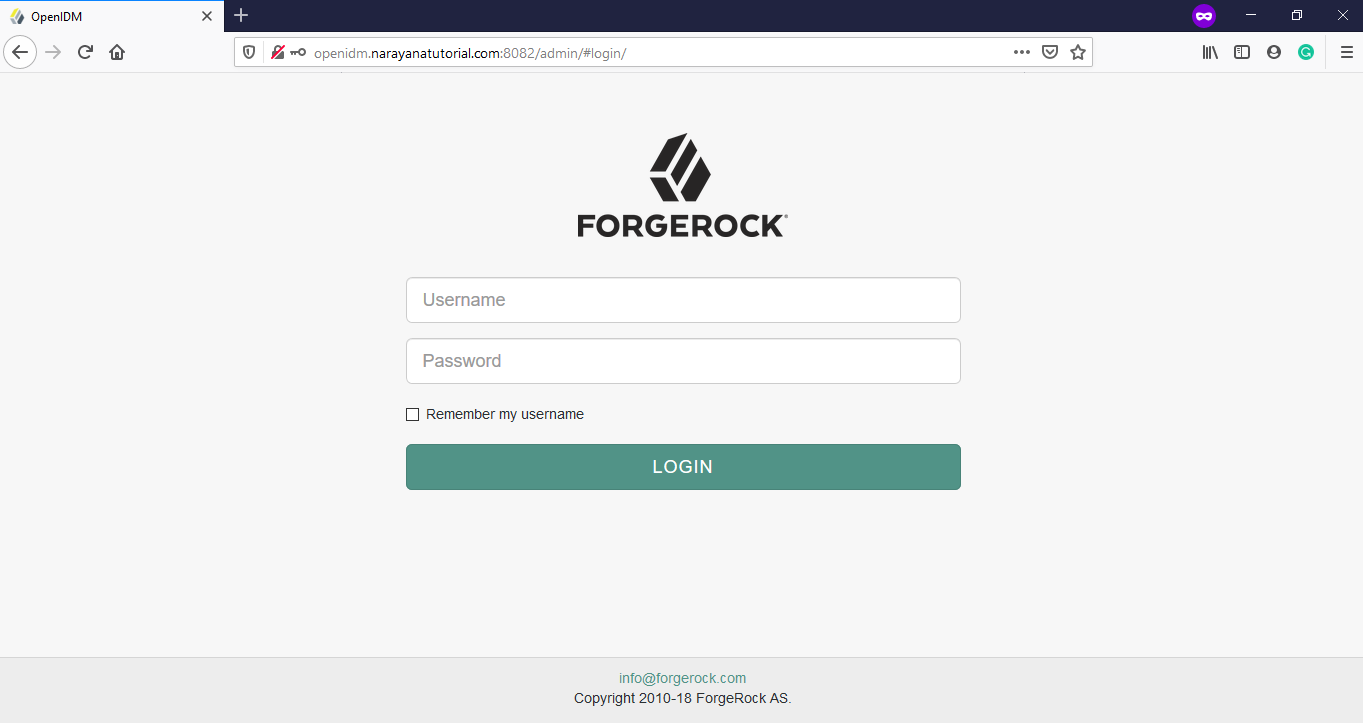
OpenIDM Admin Home
Step 2: Configure Social Identity Providers
Go to Configure -> Social Idenity Providers
Enable Google by moving slide to right.
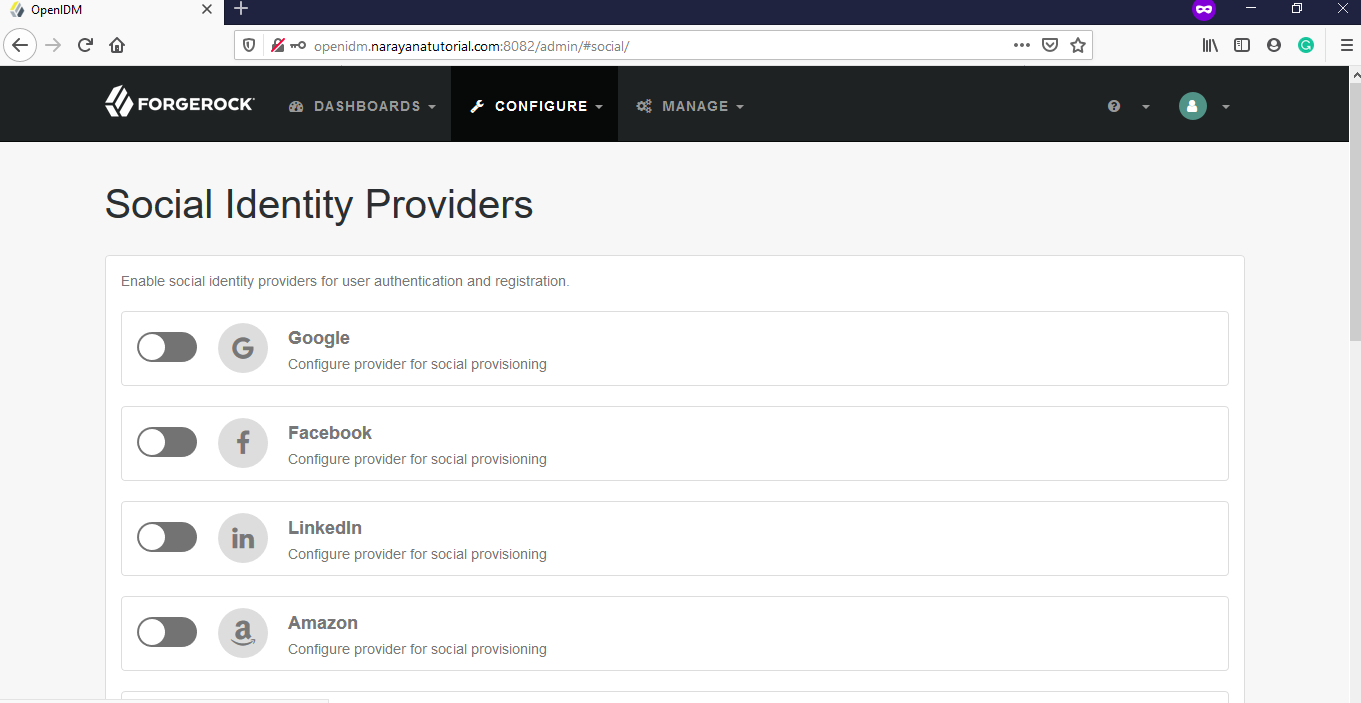
OpenIDM Social Identity Providers Home
Step 3: Google OAuth2 Provider Configuration
Here you need Client ID and Client Secret, you need to register OpenIDM in Google and then will get a client ID and Secret.
Click on Show Advanced Options to see the Google OAuth2 details.

OpenIDM Google OAuth Configuration
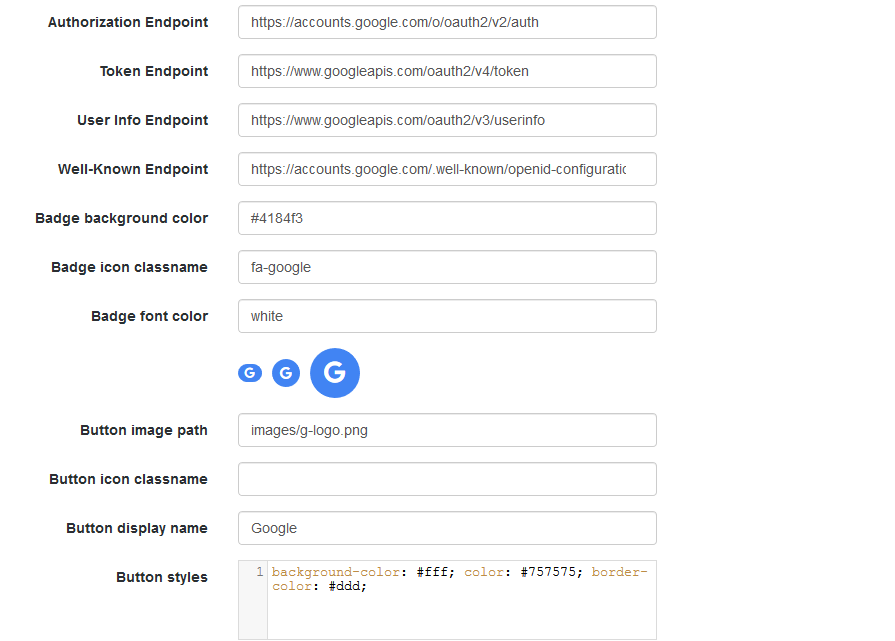
OpenIDM Google OAuth Configuration URLs
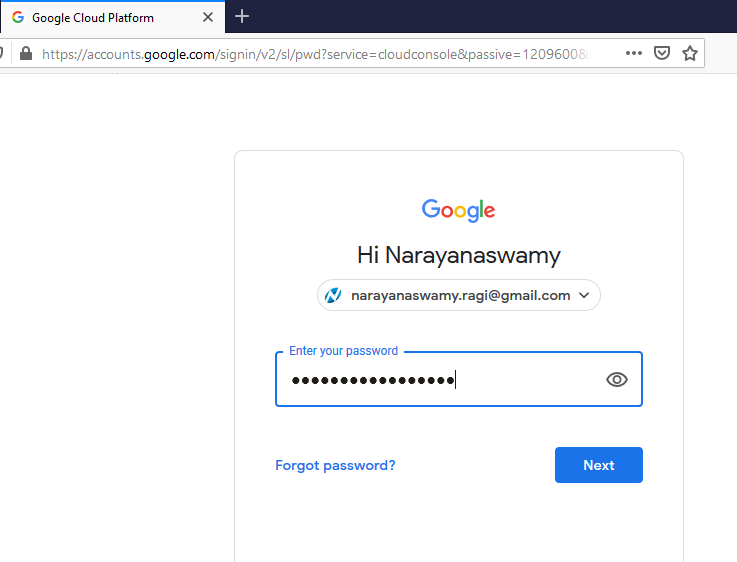
Step 4: Configure OpenIDM Application Details in Google
Login into Google Console Developer by using a Gmail account.
Console Google Developer Login
Step 4.1: Create a New Project in Google
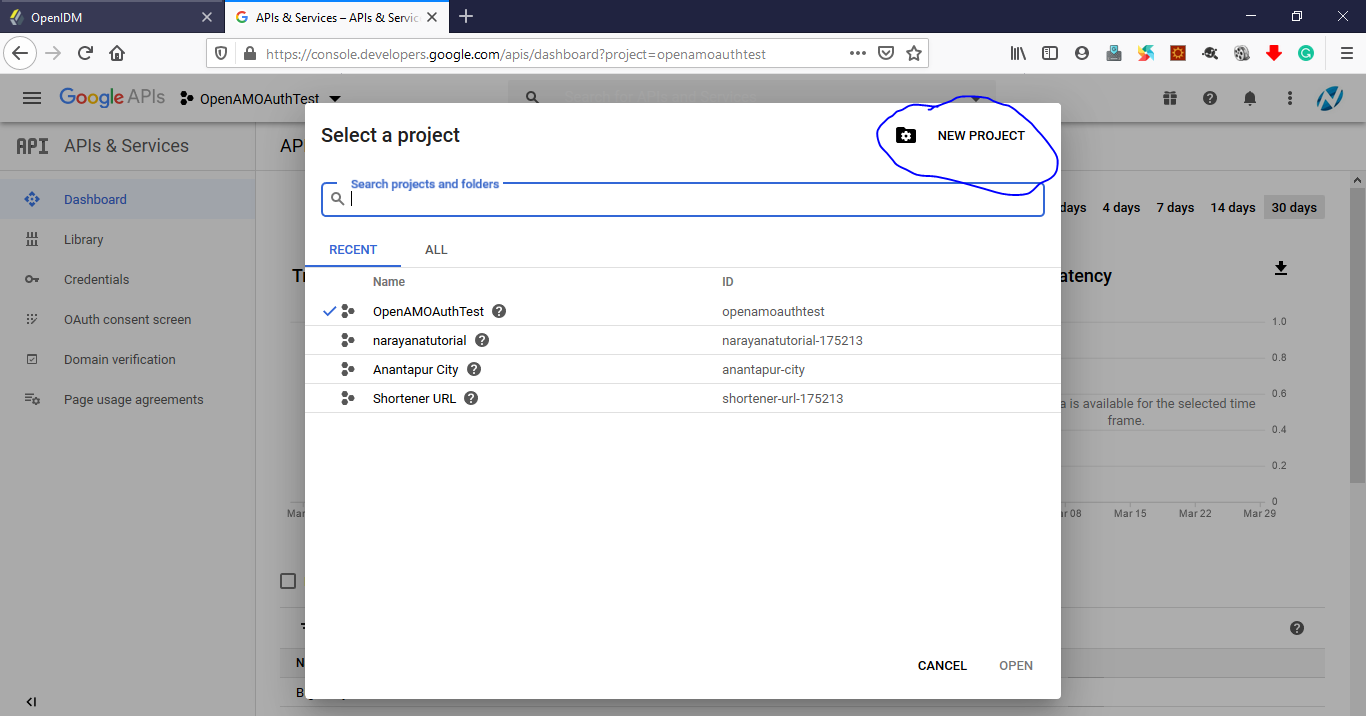
Once logged into Google Console, Click on the drop-down and create NEW PROJECT

Console Google Developer Project Selection
Console Google Developer Create New Project
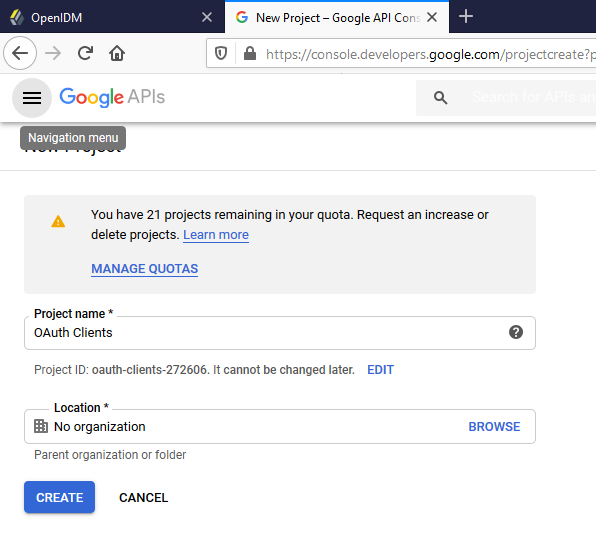
Enter project name is OAuth Clients and click on Create
Console Google Developer OAuth Client Project
Console Google Developer OAuth Client Project Created
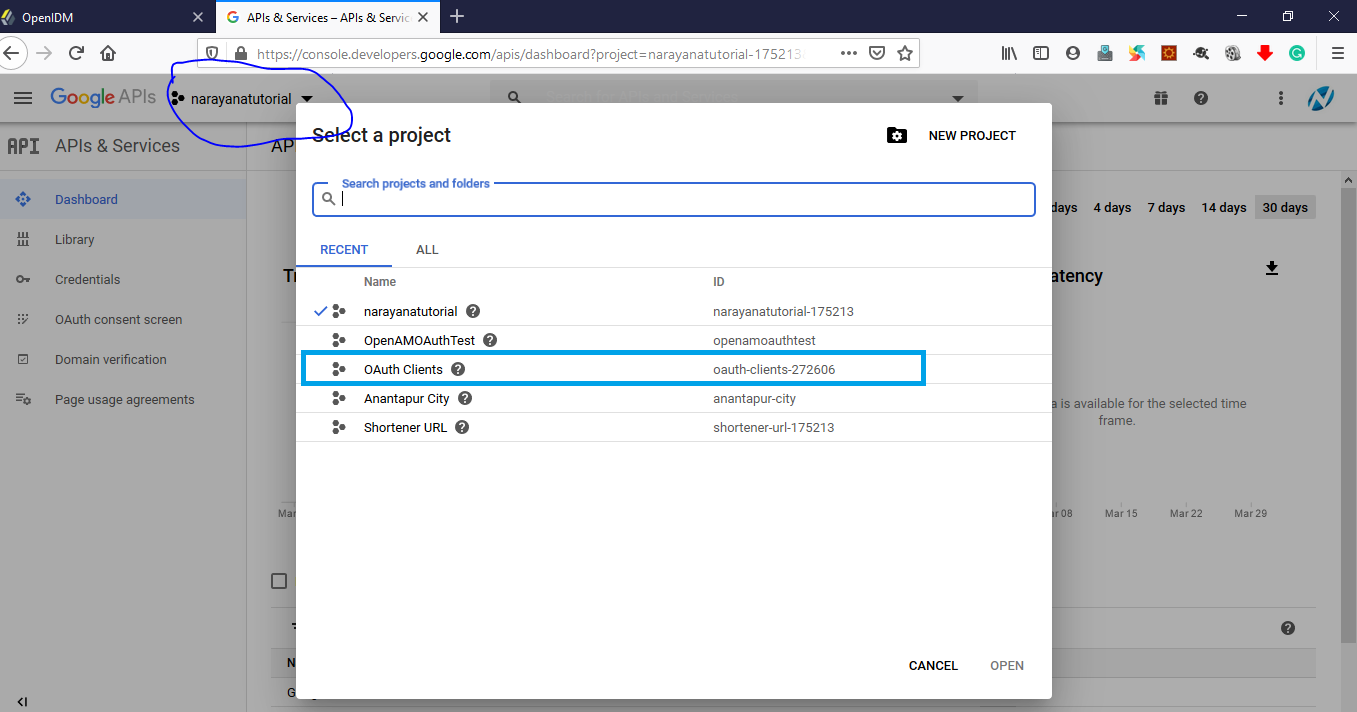
Again click on the drop-down and see the list of projects and select newly created project OAuth Clients.
Console Google Developer Project Selection
Console Google Developer OAuth Client Project Select
Step 4.2: Create OAuth2 Credential
At the left side click on Credential, and see warning message, and click on CONFIGURE CONSENT SCREEN
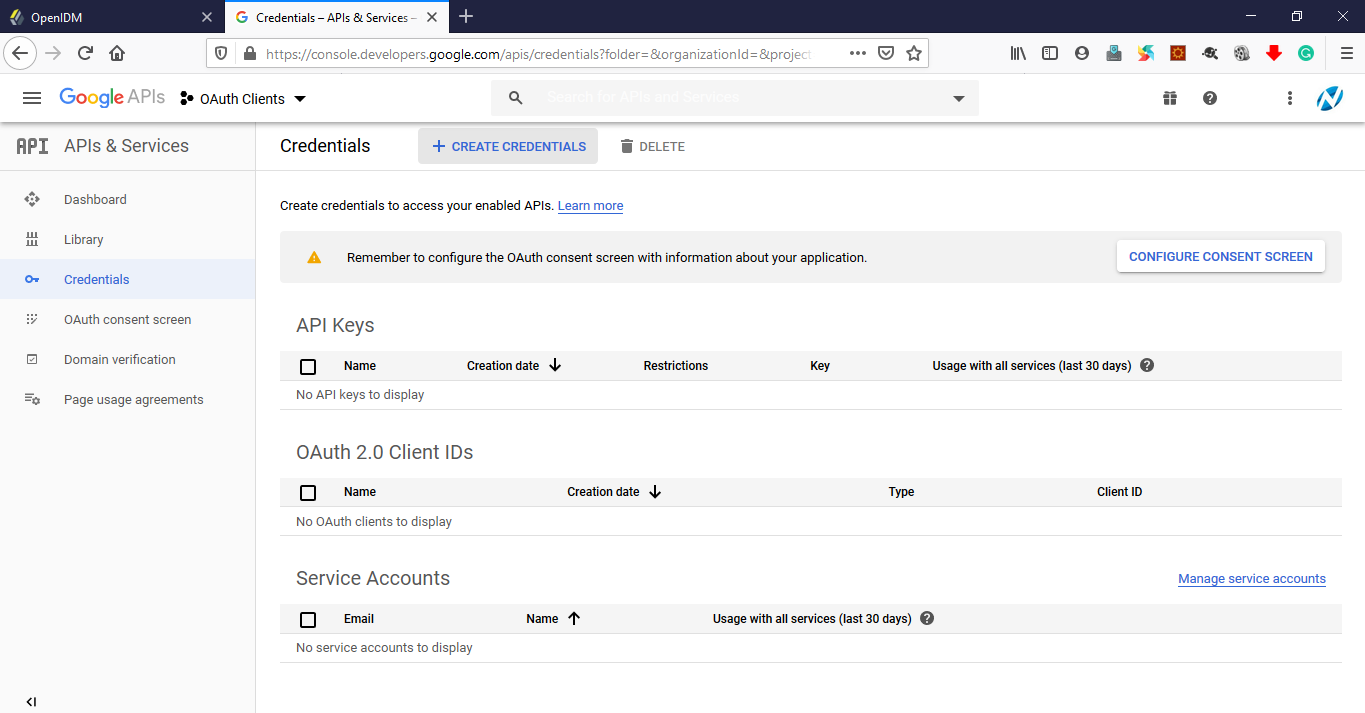
Console Google Developer OAuthClient Project Credentials
Step 4.3: Google OAuth2 Consent form
Select User Type as External and click on Create.
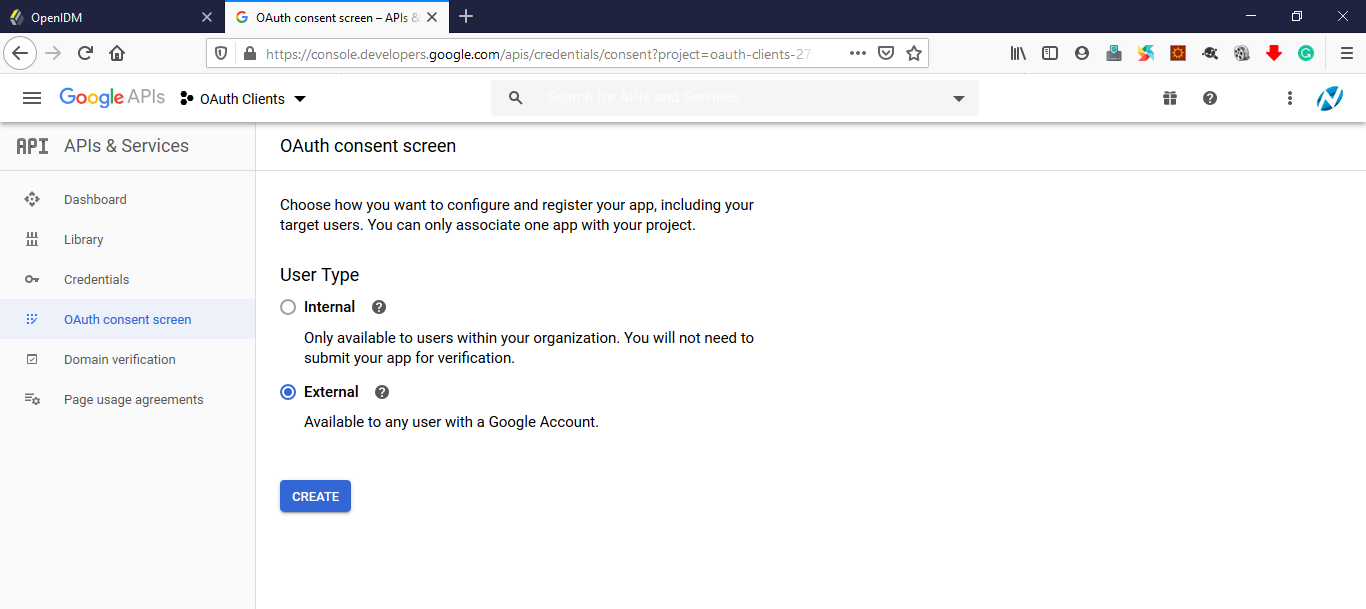
Console Google Developer OAuthClient OAuth Consent Screen
Step 4.4: Google Create Credentials
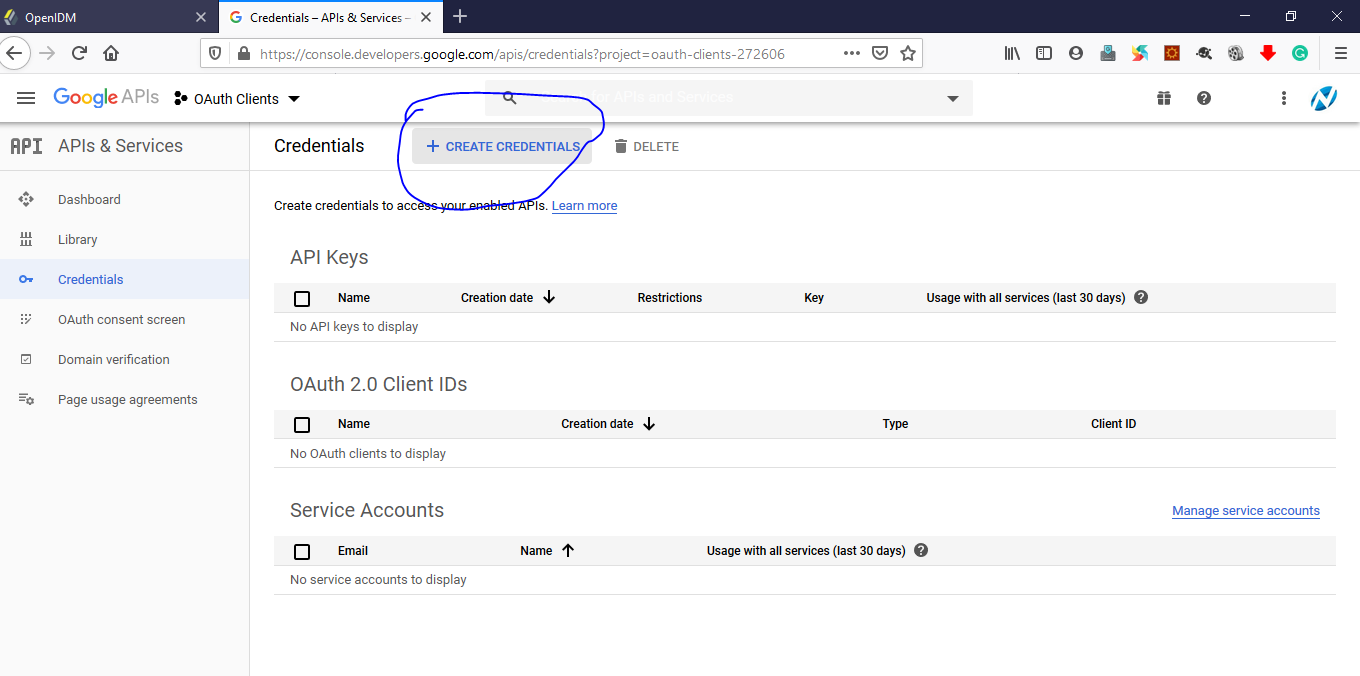
Console Google Developer OAuthClient OAuth Create Credentials
Select OAuth Client ID

Console Google Developer OAuthClient OAuth Client ID Select
Enter OpenIDM Authozied Javascript Origins i.e http://openidm.narayanatutorial.com:8082
Authorized Redirect URL: http://openidm.narayanatutorial.com:8082/
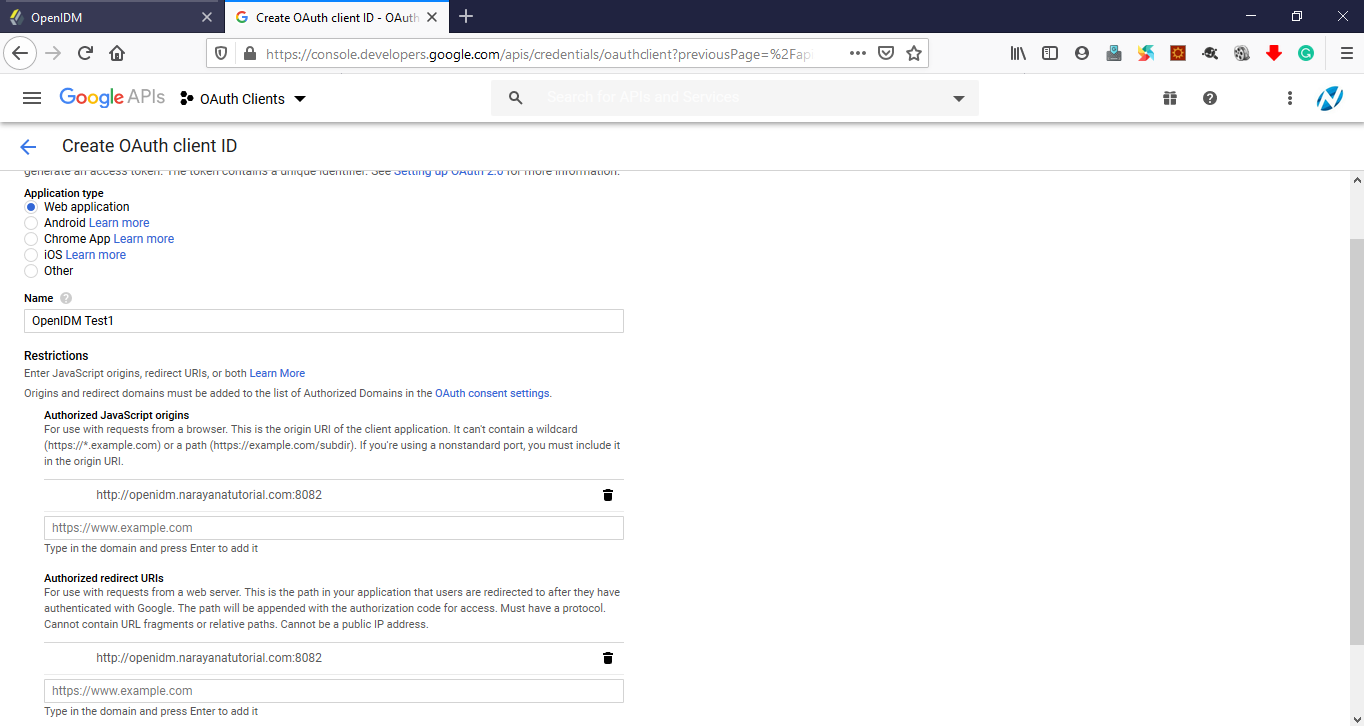
Console Google Developer OAuthClient OAuth Client ID Details
OAuth Client Created. Copy Client ID and Client Secret and paste it into OpenIDM Social Provider Google.
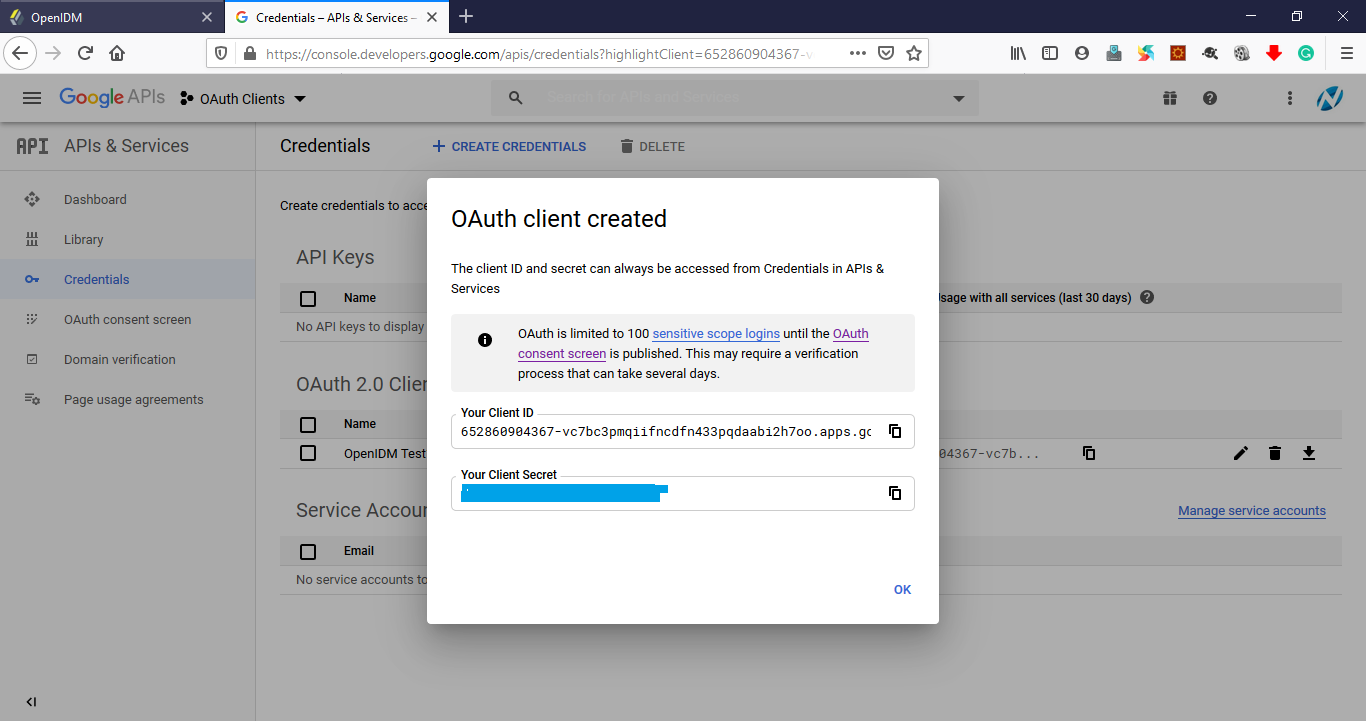
Console Google Developer OAuthClient OAuth Client Created
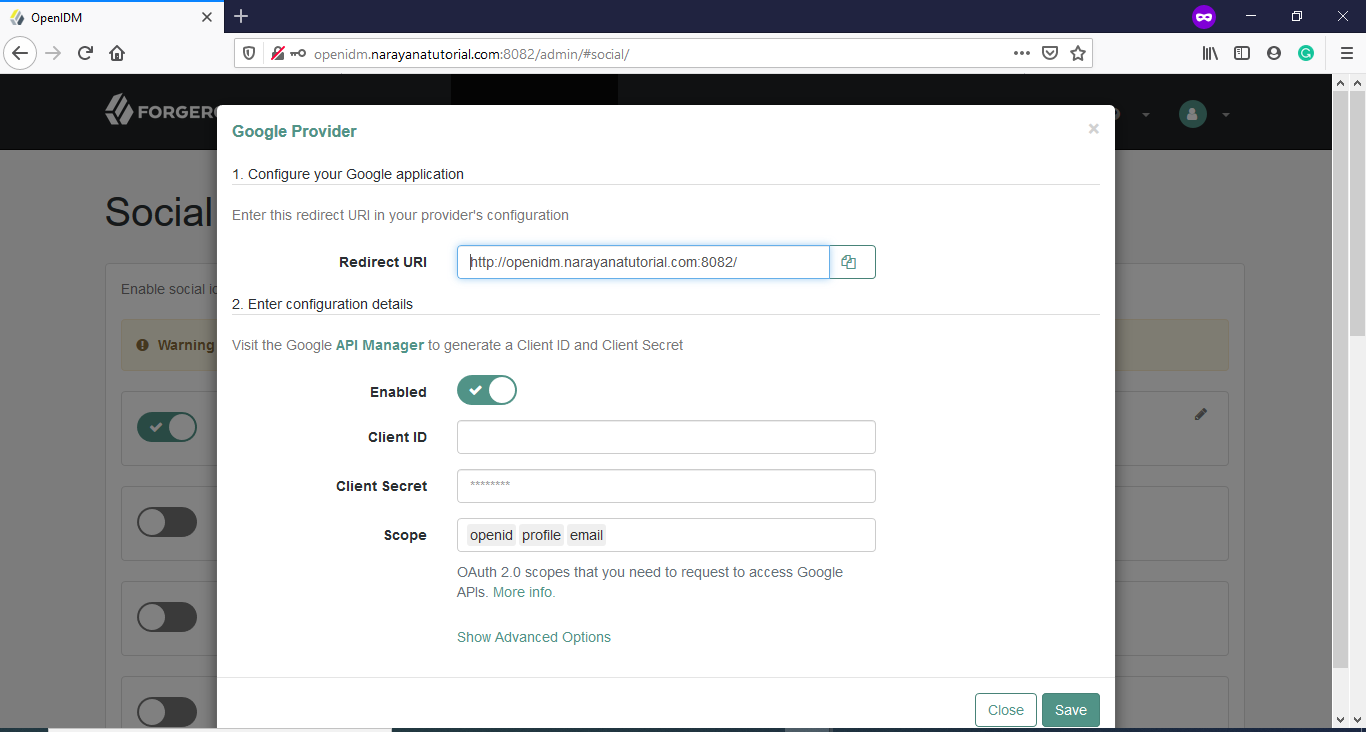
OpenIDM Google OAuth Configuration
And Enter Client ID and Client Secret and click on SAVE.
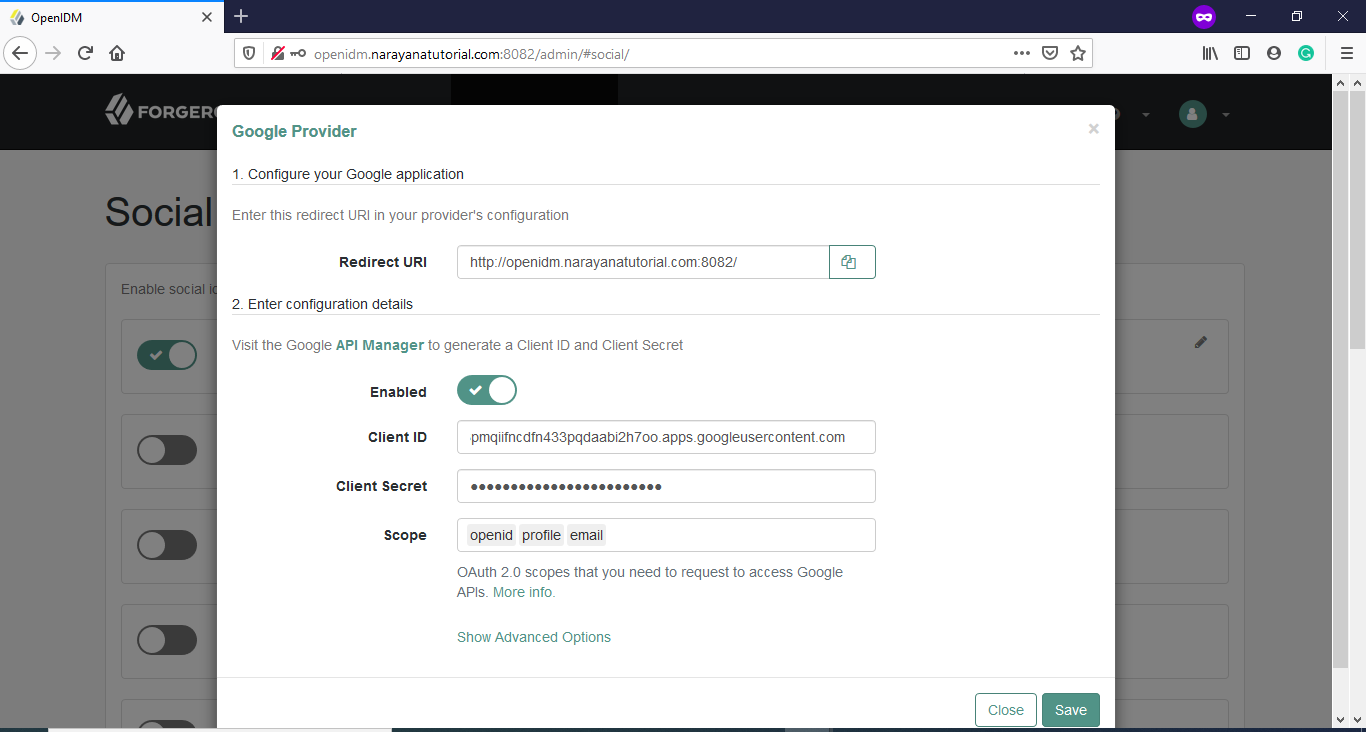
OpenIDM Google OAuth Client ID Secret Configuration
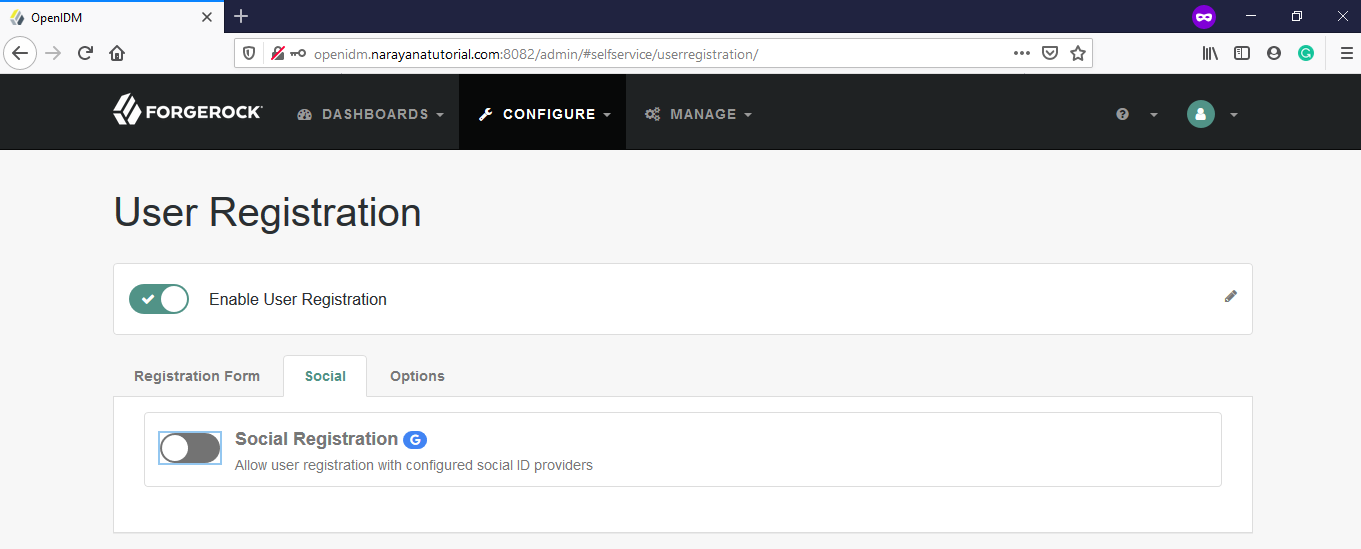
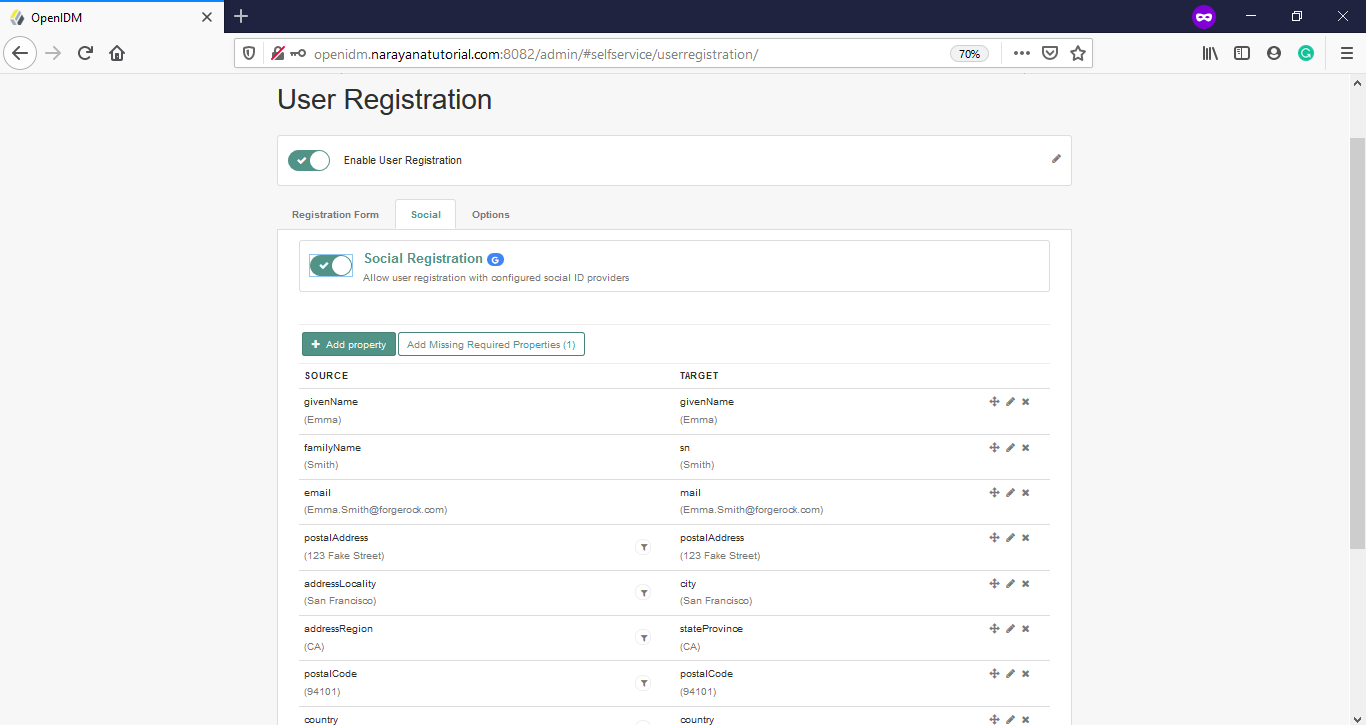
Step 5: OpenIDM User Registration
Go to Configure -> User Registration and click on Enable User Registration and then select Social tab, then enable Social Registration by moving the slider to right
OpenIDM User Social Registration
OpenIDM User Social Registration Enabled
Step 6: OpenIDM User Registration With Google OAuth2
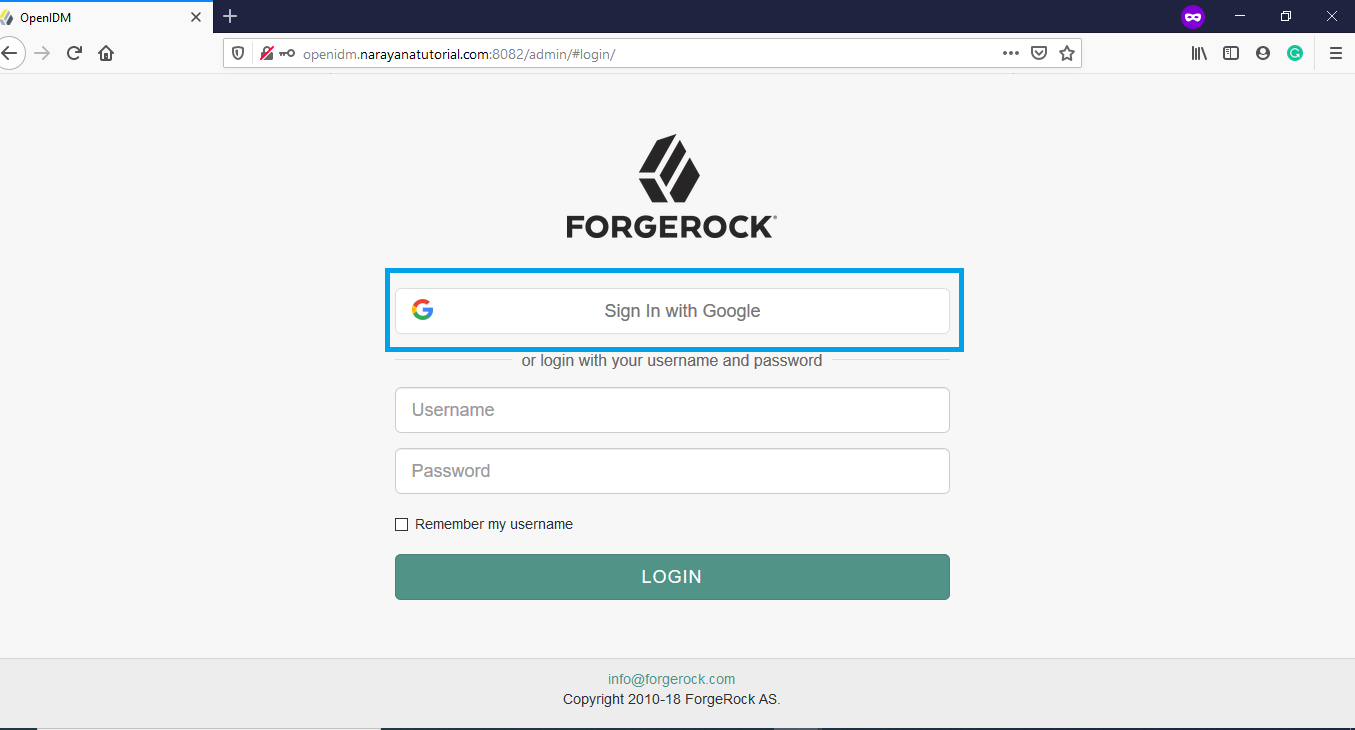
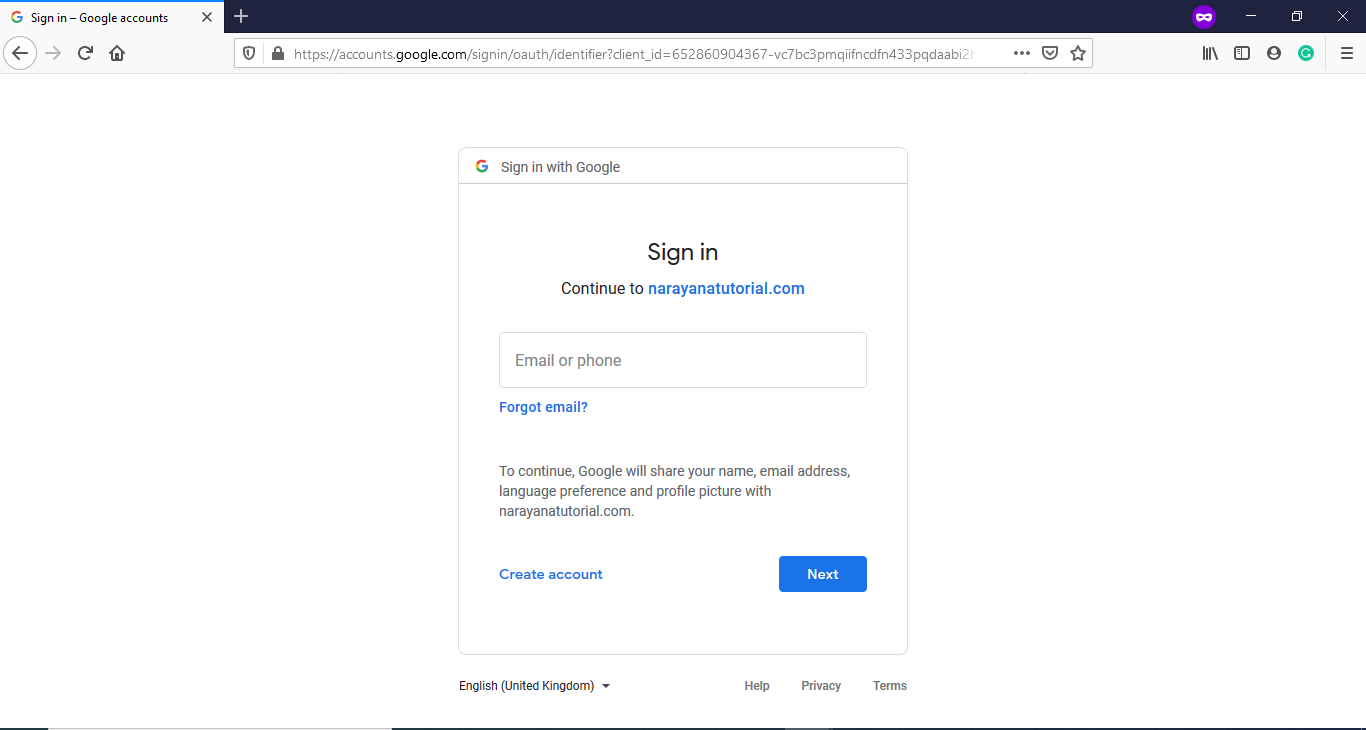
Log out the OpenIDM and then go to the login page and see the Sign in With Google.
When clicking on Sign In With Google, it will be redirected to Google to authenticate and authorization.
Click on Sign in with Google
OpenIDM User Sign In with Google
Step 7: OpenIDM – Google OAuth Authentication and Authorization
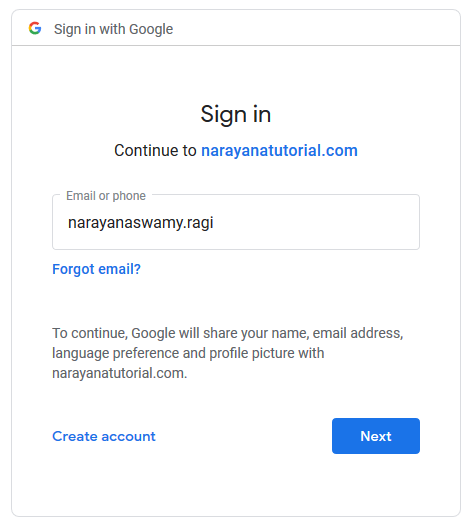
OpenIDM Google OAuth Login Username
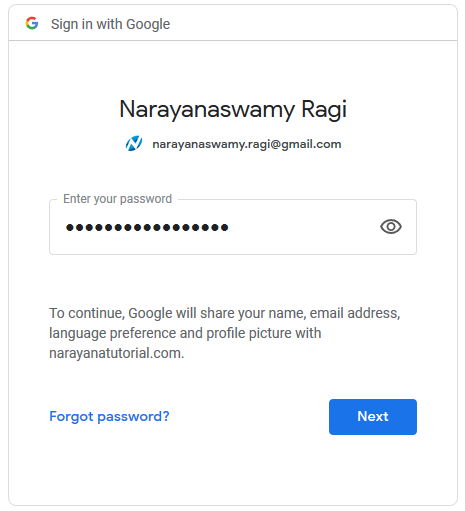
OpenIDM Google OAuth Login Password
OpenIDM Google OAuth Login
Asking Consent, click on Next and you will be redirected to the OpenIDM profile page.
Step 7: OpenIDM -Google OAuth2 Video
I hope you understand OpenIDM Social Google OAuth2 Login. Thanks for reading the article.
 Online Videos")

Hello! I am Narayanaswamy founder and admin of narayanatutorial.com. I have been working in the IT industry for more than 12 years. NarayanaTutorial is my web technologies blog. My specialties are Java / J2EE, Spring, Hibernate, Struts, Webservices, PHP, Oracle, MySQL, SQLServer, Web Hosting, Website Development, and IAM(ForgeRock) Specialist
I am a self-learner and passionate about training and writing. I am always trying my best to share my knowledge through my blog.

